This post was going to be one of those rant posts about not following instructions, and then I realized this is a common problem that a lot of people have issues with, not just in the IT world. It is the importance of knowing what L and R is referring to. By L and R, I mean left and right.
This might seem silly and trivial, because we all know our left hand and our right hand, and in general when somebody says it’s in the left hand side of the cabinet, you know exactly where to look. But what happens if you are working on something that can be reached/used from both sides? Is that the left hand side relative to the front, or the back?
This comes up with other things too. How many times have you gone to a car mechanic and said “my left brake squeals when I apply the brakes”? Is that the left side when looking at the car, or driving the car? This is why you’ll find a lot of mechanics refer to the sides as driver and passenger, there is no confusion there.
The whole point of this post is about the importance of documenting exactly what is referred to as L and R, because it makes a great deal of difference when you are putting rails on a server. Why you might ask? It’s all about server removal…
A lot of rail kits consist of 3 major parts, the server portion, the cabinet/rack portion, and the slider. The server portion is usually screwed/clipped onto the server, and is stationary. The cabinet/rack portion is also stationary, and attached to the cabinet/rack. Then there is the slider portion. This portion is “attached” to the server and cabinet portions, has ball bearings, and allows the server to slide in and out of the rack. It slides on tracks in the cabinet portion, and the server portion slides on bearings to slide out. This allows for people to work on the server without having to completely remove the server.
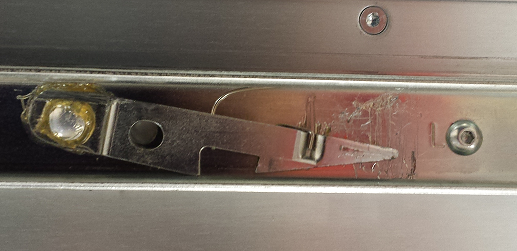
Also part of the slider is usually a catch. This catch is to stop you from pulling the server completely off the rails and having it come crashing down to the floor. Something most people don’t want to happen. And it is with this part of the rails that it is important to know what is L and what is R. This catch usually has an orientation so that it can “clip” into the slider rail, and pushing the catch down allows the server rail to slide out of the slider rail. If you mount the server rail on the wrong side, the catch either doesn’t work properly, or becomes impossible to remove.
Here is an example of one of those catches…
If looking at this, you cannot figure out how this works, here is another picture with arrows. Arrows make everything easier to understand…
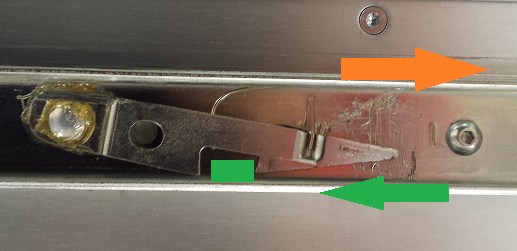
When you pull the server out, it moves in the direction of the top arrow (orange). Near the end of the slider rail is a small block, this block (shows as a green blob) moves along the server rail in the direction of the bottom arrow (green). As it gets to the catch, it pushes it up, and the spring in the catch pushes it back down when the block moves into the void. Because of the shape of the void, the green blob is prohibited from moving any further, and stops the server sliding off the end of the rail.
If you need to actually remove the server from the rails completely, you simply pull the catch up, which moves the blob outside the void of the catch, and pull the server forward. If you put the rail on upside down, instead of the block catching on the void in the catch, it actually stops when it hits the mount point of the catch. This is why it’s important to know which way around to mount the rails (note the little L next to the screw).
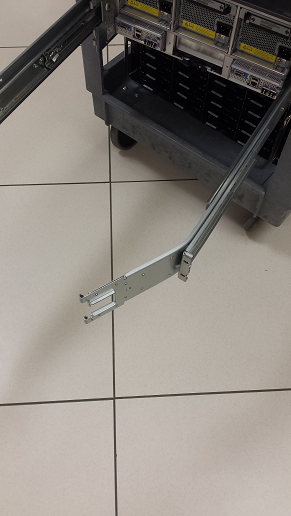
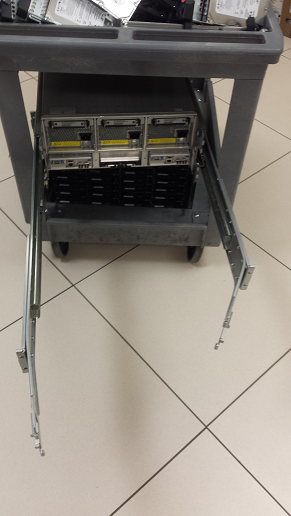
This situation caused myself and a co-worker some struggles as we could not get the server unmounted from the rails. Ultimately we ended up having to unscrew the rails from the rack, with the server still attached, fully extend the rails, and then bend them in so that we could pull the server out of the rack. Fortunately this was a sever that is well past EoL, so this wasn’t a hard decision to make, or live with.
That all being said, it is important to make documentation as clear and concise as possible. Images are very useful in this situation. A server we put in place of this one had really clear documentation, and the rails themselves even had pictures of the configuration, essentially saying “This rail goes on the left here” with a picture of where the rail was located in relation to the server.
So next time you’re writing documentation for something, and there is an opportunity for ambiguity, clear up the documentation and remove any doubt.